- Entered by the employer through the Manage Time Cards page, or
- Entered by the employee through their employee portal account.
Note: Only time cards that have not yet been paid can be edited. Paid time cards can no longer be edited.
To enter or edit time for an hourly employee:
1. Go to Payroll > Time and Attendance Tasks > Manage Time Cards. By default, a list of employee time cards will display for the current pay period. To edit a different pay period, choose the dates from the dropdown menu and click Run Report.
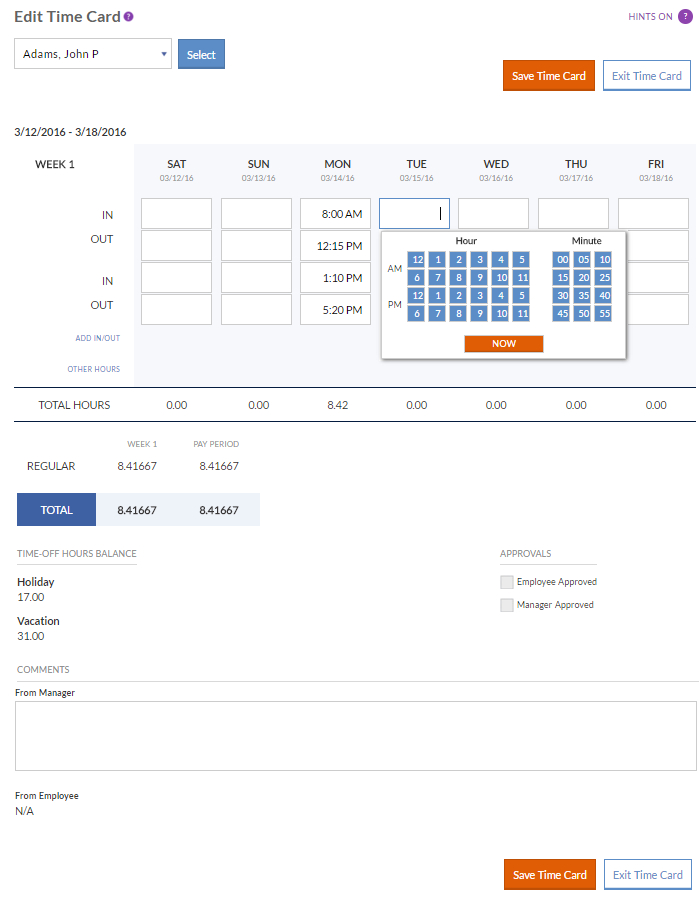
2. Click the Edit (pencil) icon in an employee’s row to view and make changes to the time card. If the employee is paid weekly, the time card will show a grid for one week. If the employee is paid biweekly, the time card will show a grid for two weeks. Each day is shown in columns, and the hours types are shown in rows.
3. Enter the times of day the employee the employee started and stopped work in the “In” and “Out” cells. Click inside each cell, and a pop-up time entry window will display. You can click on the hour and minute, or click “Now” for the current time. If you prefer, you can also manually type the hours and minutes in the following format: 9:00[space]AM.
4. Click Add In/Out to add another set of fields for the day. For example, in order to track paid breaks, just add another set of fields, and enter the paid break start time in the “In” field and the stop time in the “Out” field.
5. To add non-worked hours such as vacation or holiday, click “Other Hours.” New rows will appear on the time card. Enter the total daily non-worked hours in the corresponding row.
6. Add any comments, if needed. There is a space at the bottom of the time card to add manager comments about this pay period. Employees using their portal can also add their own comments. Note that your comments will be visible to employees.
7. Check the “Manager Approved” box when you’re finished entering time for the pay period. It is not necessary for the employee-approved box to be checked.
8. Click Exit Time Card. A box will appear asking if you want to save your changes. Answer yes or no.
9. Once you approve the time cards, you are ready to send to payroll.